WE’RE ON AN OATMEAL KICK HERE IN ROME. The temperatures are cooling off and Phoebe has recently discovered dried cranberries which means oatmeal every morning, naturally. We’re just doing the quick oats which cook in one minute…except they don’t. It takes several minutes to boil the water, then another couple to cook the oats. I’m not saying it’s difficult, I’m saying that it’s not that quick. This is because I have a two-foot tall person squawking at me, pointing to her high chair and maniacally eagerly awaiting the grub.
However when the oats are done, they’re boiling hot, literally. The steamy cauldron that is Phoebe’s little oatmeal bowl actually takes longer to cool than it did to cook. We’ve settled on putting an ice cube in the middle and pouring cold milk over the top, which works okay. But there’s still a five-minute blow, blow, blow, “hop?”, “yes it’s hot” routine so, a substitute was in order. And what better place to start than…The Barefoot Contessa Cookbook.
Once again I’ve done my best to cut down on sugar and fat and add a little more nutrition. But Barefoot is Barefoot, and these are scones. So there is butter, serious butter, in the batter. It’s evened out though, sort of, by using whole wheat flour, oatmeal and raisins–and only one tablespoon of sugar because you get a great kick of sweet flavor by using maple syrup.
The verdict? All smiles here. And no slimy pan to clean out today. Yahoo! And yes, these are going into the freezer for Friday’s playgroup.
OATMEAL RAISIN SCONES
Adapted from The Barefoot Contessa
The original recipe makes twice as much dough; I halved the ingredients and used a smaller cookie cutter for toddler-sized baked goods. If you want bigger scones–or more scones–just double the recipe.
Makes 24 small scones
- 2 1/4 cups whole-wheat flour flour
- 1/2 cup quick-cooking oats, plus additional for sprinkling
- 1 tablespoon baking powder
- 1 tablespoon granulated sugar
- 1 teaspoons salt
- 1/2 pound cold unsalted butter, diced
- 1/4 cup cold buttermilk
- 1/2 cup pure maple syrup
- 2 large eggs
- 3/4 cup raisins
- 1 egg beaten with 1 tablespoon milk or water, for egg wash
- 1/2 cup pure maple syrup
- 1 teaspoon pure vanilla extract
Preheat the oven to 400 degrees F. Use an electric mixer with a paddle attachment to combine the flour, oats, baking powder, sugar and salt. Keep the butter in the fridge until you’re ready to use (ditto for the buttermilk); once the dry ingredients are blended, add the butter on low speed until it looks worked it but still chunky. You should see pieces of butter about the size of peas. Add the cold buttermilk, maple syrup and eggs to the flour-and-butter mixture. Add the raisins last. Move quickly but mix until just blended. The dough is very sticky.
Dump it out out onto a well-floured surface. Flour your hands and pat the dough until its 3/4 to 1 inch thick. Cut into 2-inch rounds with a plain cutter (even a drinking glass works) and place on a baking sheet lined with parchment paper.
Brush the tops with egg wash. Bake for approximately 10 minutes, until the tops are crisp and the insides are done. DON’T OVER BAKE these though. Keep an eye on them because my first batch came out much more brown and much less tasty.
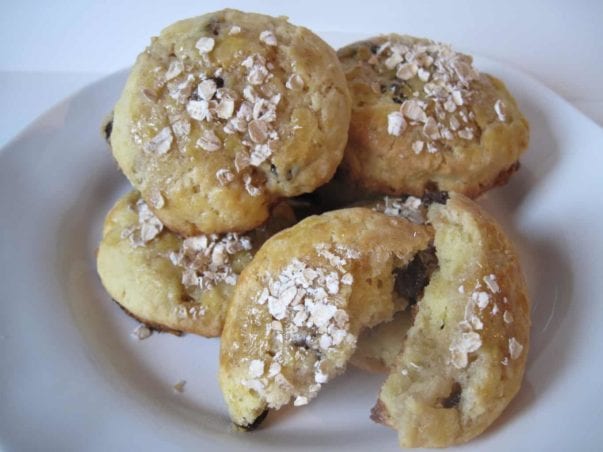
The glaze is simple: combine the maple syrup and vanilla. When the scones are done, drizzle each warm scone with a teaspoon of the glaze. While the syrup is still sticky, sprinkle some raw oats on top.
No buttermilk? Use regular milk and add the juice from a quarter of a lemon. Stir gently and let it set up in the fridge until you’re ready to use it. Buttermilk is actually a low-fat, high-flavor option so don’t shy away from feeding it to your little ones–or yourself.


So, I was looking at the chilled butter, diced. I remembered that for biscuits I freeze my butter and then grate it into the recipe when its time for it. I decided to try that for these and ended up with a nice flaky texture, just like when I make the biscuits. I picked up that trick from some show on Food Network, forget which one or I would credit it. But it works well for when you need to incorporate cold butter into something (since it does not stay frozen for long once you grate it, but stays nice and cold) just hold the grater over the bowl of flour and as you get a small pile of it, sort of toss it into the mix so you don’t end up with one giant butter lump. I usually grate one tablespoon more than the recipe calls for because some of the butter will stay on the grater and its hard to get off without making a huge mess.